How to Apply I Tip Hair Extensions?
If you are looking for a flexible way to add length and volume without heat or glue, the I tip hair extension method is one of the best options. If you’re a salon stylist or international hair distributor, learning the correct way to apply I tip hair extension systems is essential. I tip extensions are growing fast in the European and North American market because they offer flexibility, long-lasting hold, and damage free results for clients who want natural movement and lightweight volume.
This method doesn’t require heat or glue, which makes it a favorite for clients with thin or sensitive hair. In this full guide, you’ll learn not only how to apply I-tip extensions but also maintenance, client consultations, bead types, and business tips for salons and bulk buyers.

What Are I Tip Hair Extensions?
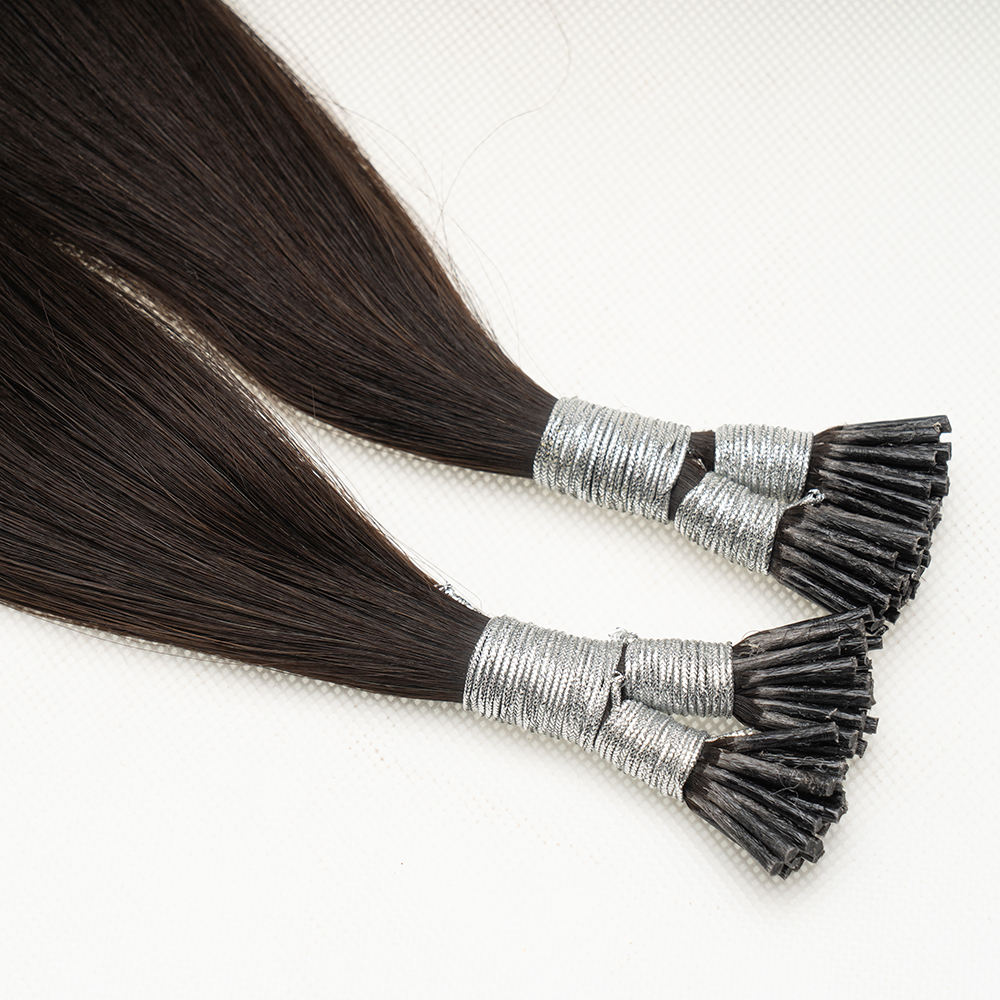
I tip hair extensions are individual strands with a keratin “I-shaped” tip. They are installed strand by strand using tiny beads instead of adhesive. This makes them a safe option for clients who want freedom in styling, especially those who avoid glue-ins or tape-ins.
These extensions work great for adding:
- Natural volume
- Seamless length
- Custom highlights without bleaching
- Flexible styling (pony, bun, curls, straight styles)
Many stylists prefer I-tips because they move like natural hair and blend beautifully even in finer textures.
Who Are I Tip Hair Extensions Best For?
This method works well for:
- Clients with fine to medium hair
- People who want a heat free extension method
- Active clients who sweat or swim regularly
- Clients who love updos and high ponytails
- Those who prefer long-wear hair extensions with minimal damage
For fragile hair, many stylists choose lightweight I tip extensions for thin hair to prevent tension and ensure comfort.
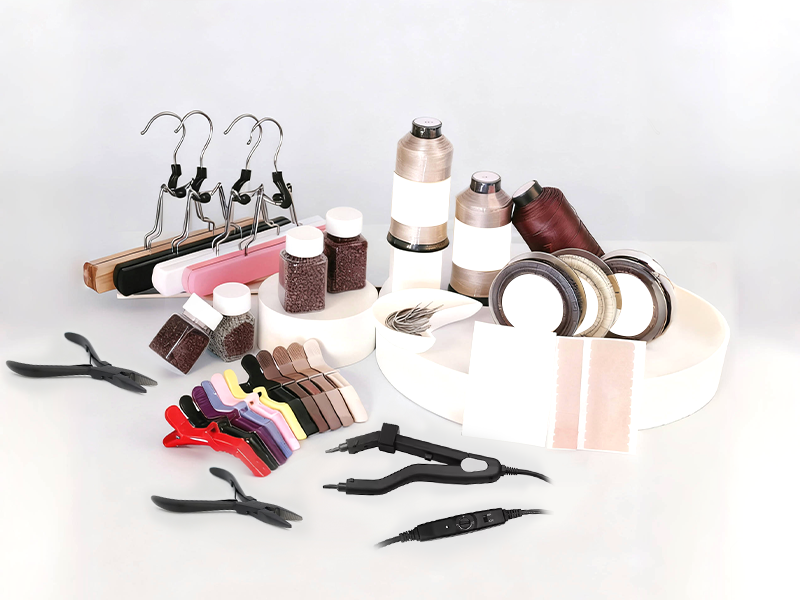
Tools You Will Need
To apply I-tip extensions professionally, prepare:
- I tip hair strands (100% Remy recommended)
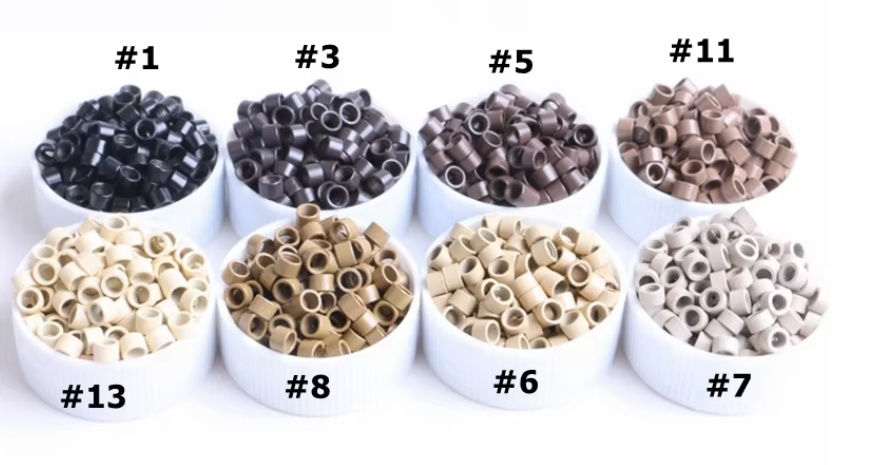
- Silicone micro beads for I tip extensions
- Loop threader or pulling needle
- Precision sectioning comb
- Section clips
- Professional microlink pliers
- Heat-protect finishing spray and detangling brush
Stylists love using silicone micro beads because the silicone lining grips the natural hair softly and securely, minimizing slippage and protecting delicate strands.
Step-by-Step: How to Apply I-Tip Hair Extensions
1. Wash & Prep the Hair
Wash hair with clarifying shampoo to remove oils and buildup. Do not use conditioner or masks. Clean roots help beads hold better, especially during long term wear I tip extensions.
Blow dry completely and detangle before installation.
2. Section the Hair
Use neat horizontal sections. Start at the nape, working upwards.
Avoid placing extensions too close to the hairline or parting line to keep beads invisible.
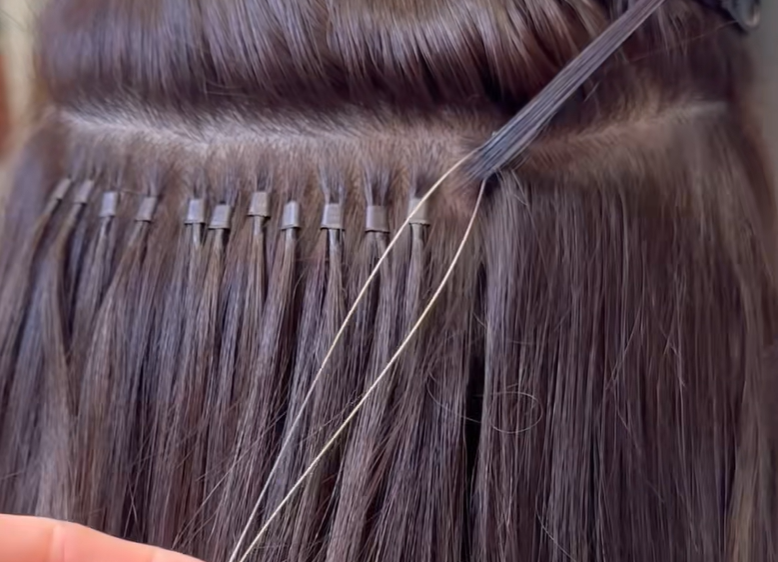
3. Insert the Bead
Use your loop tool to pull a small strand of natural hair through the bead. Make sure the amount of hair matches the weight of the extension strand. This is important for secure hold and comfortable wear.
Clients with finer hair benefit most from ultra small beads for I-tip hair extensions because they are lightweight and discreet.
4. Insert the I-Tip & Clamp
Insert the I-tip strand into the bead beside the natural hair. Slide the bead near the scalp and clamp firmly with pliers. Do not crush too hard—just firmly enough for a secure lock.
Continue across each row, keeping even spacing for comfort and movement.
5. Blend & Style
After installation:
- Trim for shape if needed
- Style with heat tools or brush-through curls
- Finish with lightweight serum
The finish should look seamless and natural, especially on I tip extensions for thin hair installation clients who need smooth blending.
After-Care Instructions for Clients
Educate clients on proper care. Advise them to:
- Brush with a loop brush 2–3 times daily
- Avoid oily products at the roots
- Sleep with a loose braid or silk cap
- Shampoo gently & condition mid-length to ends
Regular salon maintenance every 6–8 weeks helps reposition beads and protect natural hair.
Tips for Best Results
Match hair texture and weight to the client
Choose pre-bonded I-tip Remy extensions for superior longevity
For blonde clients, use beads close to root color
For active clients, recommend sweat resistant micro beads for I-tip extensions
Consistency, clean sectioning, and correct tension make all the difference in retention and comfort.
Maintenance & Longevity
With the right beads and proper technique, clients can enjoy 3–5 months of wear. The beauty of this method is that extension strands can be reused during re-installation, making it cost-effective for long-term users.

Why Salons & Wholesale Buyers Choose I-Tips
I-tips are now a top seller for extension specialists in the US and Europe because they:
- Are safe and non-damaging
- Offer natural movement
- Work well for sensitive scalps
- Are ideal for active clients
- Fit high-ticket luxury services
- Provide repeat maintenance revenue
For wholesale buyers, I-tip strands are a must-stock category because demand continues to rise for keratin tipped microlink extensions in premium salons.
Why Choose Shiny Hair Factory I Tip Extensions?
At Shiny Hair Factory, we supply premium I-tip hair extensions made from 100% cuticle-aligned Remy hair. Our strands are double-drawn for fullness from top to bottom, ensuring volume and smooth blending for all hair types.
Shiny I–Tips Hair Offer:
- Strong Italian keratin tips
- Long-lasting wear without shedding
- Perfect for micro link and bead installations
- Soft, silky texture that holds style
- Available in straight, body wave, and curly
- Custom colors & lengths for wholesale clients
We also provide silicone micro beads, tools, and bulk options, making it easy for salons and distributors to source everything in one place. Fast delivery, OEM options, and private-label support are available for growing hair brands.
Contact Shiny Hair Factory for wholesale pricing, color charts, and OEM/private-label service.
FAQ About I Tip Hair Extensions
Q1: Are I Tip hair extensions damaging to natural hair?
When installed and maintained correctly, I Tip hair extensions are considered one of the least damaging extension methods. Because there is no heat or adhesive involved, the risk of hair breakage is reduced. However, improper installation, beads that are too tight, or lack of maintenance can cause tension or slipping.
Q2: How long do I Tip hair extensions last?
High-quality I Tip hair extensions can last 6–12 months or longer, depending on hair quality and care routine. The beads typically need to be moved up every 6–8 weeks as natural hair grows, but the same hair can be reused multiple times.
Q3: Can I install I Tip hair extensions at home by myself?
While it is technically possible, self-installation is not recommended, especially for beginners. Proper sectioning, bead placement, and tension control require professional skills. For best results and to avoid damage, I Tip extensions should be installed by a trained stylist.
Q4: How many I Tip extensions do I need for a full head?
The number depends on hair thickness and desired volume:
80–100 strands: Volume or partial installation
120–150 strands: Natural full head
180–200 strands: Extra volume or thick hair
A professional consultation is the best way to determine the exact amount.
Q5: Are I Tip extensions suitable for fine or thin hair?
Yes. I Tip hair extensions are often recommended for fine or thin hair because they are lightweight and applied strand by strand. Choosing smaller micro beads and proper strand weight helps ensure a natural look without stressing the hair.
Q6: Can I style I Tip hair extensions with heat?
Yes, if the hair is 100% human hair, you can curl, straighten, and style it like natural hair. Always use a heat protectant and avoid applying heat directly to the micro beads.
Q7: How often do I Tip hair extensions need maintenance?
Maintenance is typically required every 6–8 weeks. During maintenance, the beads are opened, moved closer to the scalp, and reclamped. Skipping maintenance may cause tangling or stress on natural hair.
Q8: Are your I Tip hair extensions suitable for professional salon use?
Yes. Our I Tip hair extensions are designed specifically for professional salons and extension specialists. The hair is carefully sorted for consistent thickness, aligned cuticles, and strong tips to ensure smooth installation, minimal shedding, and long-lasting wear for salon clients.
Q9: Can I customize length, color, and strand weight for my salon or brand?
Yes. We support full customization for wholesale and private-label clients, including:
- Hair length and strand weight
- Custom colors, balayage, ombré, or color rings
- Micro bead size and color matching
- Packaging with your own branding
This flexibility helps salons and distributors differentiate their offerings and build brand loyalty.
Q10: What packaging options are available for wholesale orders?
We offer both neutral packaging and custom branded packaging for salons, wholesalers, and distributors. Packaging options can be tailored to your brand image and retail needs, helping you present a more professional product to your clients.
Final Thoughts
Installing I tip hair extensions is a gentle, secure, and long-wear method ideal for thin to medium hair clients who want flexibility and natural movement. With the right tools, bead type, and technique, stylists can achieve beautiful, long-lasting results that keep clients returning every few months.
Whether you’re a stylist expanding your service menu or a buyer sourcing quality I-tip extensions for global customers, understanding application and client care is key to success in this category.