Hur installerar jag Butterfly Weft Extensions?
A Professional Step-by-Step Guide by Shiny Hair Factory
Butterfly Weft Extensions have quickly become one of the most in-demand methods for salons in 2024–2025. These twin tabs wefts are popular because they are ultra-thin and lie completely flat. They are also easy to cut and customize. Stylists love them for their comfort and long lasting wear.
1. What Are Butterfly Weft Hair Extensions?
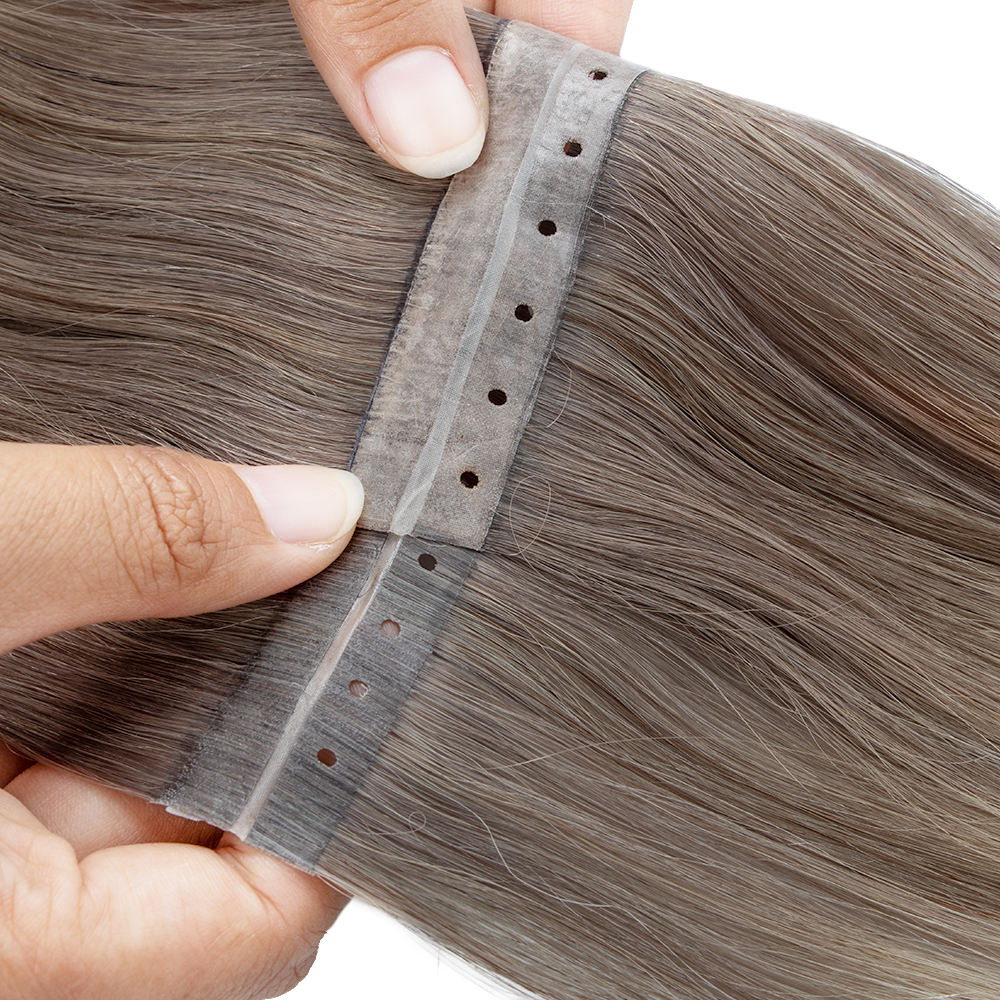
Butterfly wefts hair extensions are the next-generation hair extensions designed for a flawless, natural look. Their ultra flat, flexible PU base sits perfectly against the scalp, while small butterfly openings make attaching with microbeads easy and secure. These wefts blend seamlessly, feel lightweight, and stay comfortable all day. No glue, no tape, and minimal stitching means faster, gentler installation. It is perfect for adding volume and length without damaging natural hair.
Viktiga funktioner
- Ultra thin, flexible base:
The slim PU band lays flat against the scalp and adapts to the head’s natural shape, creating a seamless, invisible finish.
- Butterfly shaped openings:
These small openings make bead placement easier and ensure even weight distribution. This reduces tension, pulling, and pressure on the scalp.
- Lightweight and comfortable:
The soft construction avoids bulk. It’s a great choice for clients with fine, delicate, or sensitive hair who want a natural, comfortable extension option.
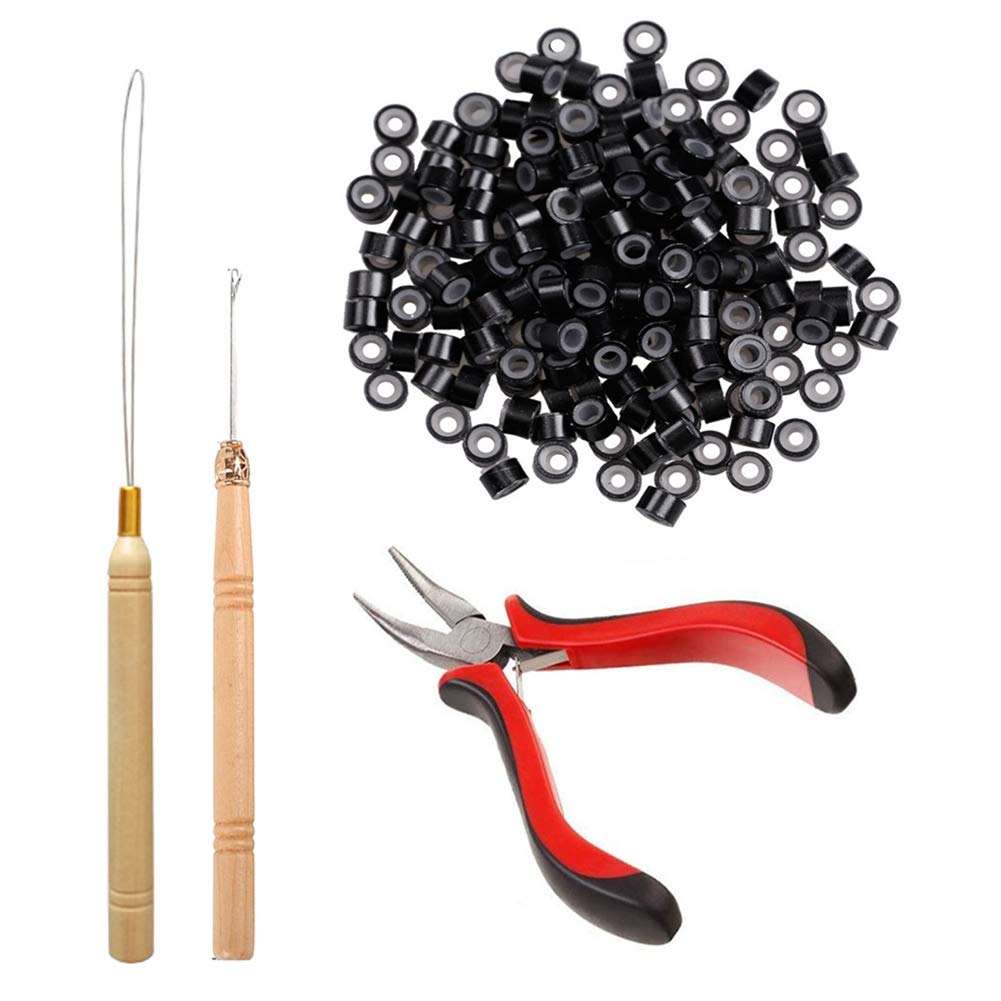
2. Tools & Preparation for Butterfly Weft Extensions
You Will Need:
- Sectioning clips
- Rat tail comb
- Microbeads (preferably silicone lined)
- Loop tool or crochet hook
- Pliers
- Sharp shears
- Heat safe styling tools
- Butterfly Wefts (usually 2–3 pieces per install)
 Client Prep:
 Client Prep:
- Shampoo only, no conditioner at the roots
- Fully dry the hair
- Detangle thoroughly
- Discuss goal length, thickness & color
- Match shade and determine grams needed
3. Step by Step Installation Guide
STEP 1: Create a Clean Section
- Start at the nape of the neck
- Create a horizontal parting
- Clip the rest of the hair away
Why it matters:
A clean foundation ensures the weft lies flat, stays secure, and blends seamlessly.
How many wefts to use?
Normal density → 2 wefts
Thicker, fuller look → 3 wefts

STEP 2: Measure & Trim the Weft
- Butterfly Wefts are fully customizable.
- Measure the head from temple to temple
- Trim the weft to match the section width
- Our standard width is 33 cm (13 inches)
- Cut confidently — sealed edges prevent fraying
You may also layer or stack wefts for extra fullness.
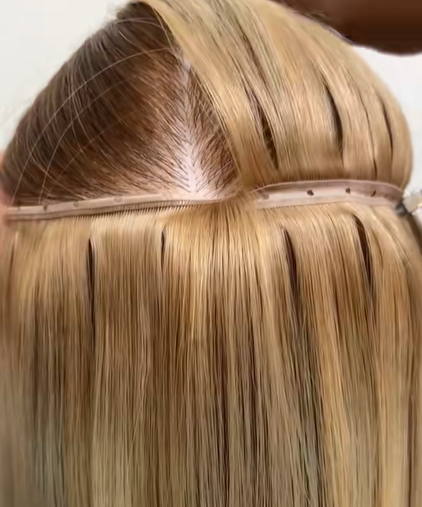
STEP 3: Position the Weft
- Lay the weft across the parted section
- Clip both ends with metal clips
- Ensure the track is straight and tension-free
- This stabilizes the weft before beading.
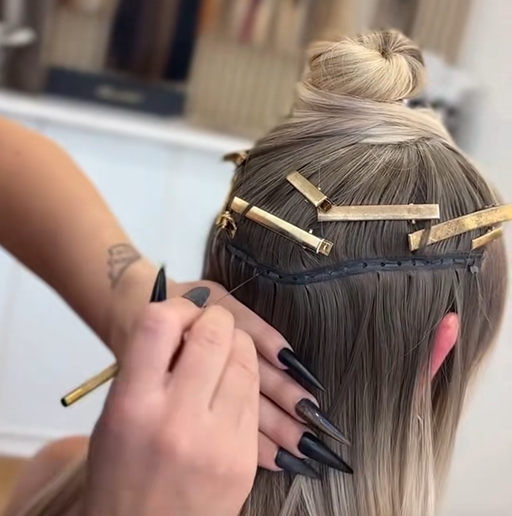
STEP 4: Bead Installation
1. Pull Hair Through Each Hole
Using a crochet hook:
- Pull a small, stable strand through each pre-punched hole
- Avoid taking sections that are too thin
- Keep tension gentle and even
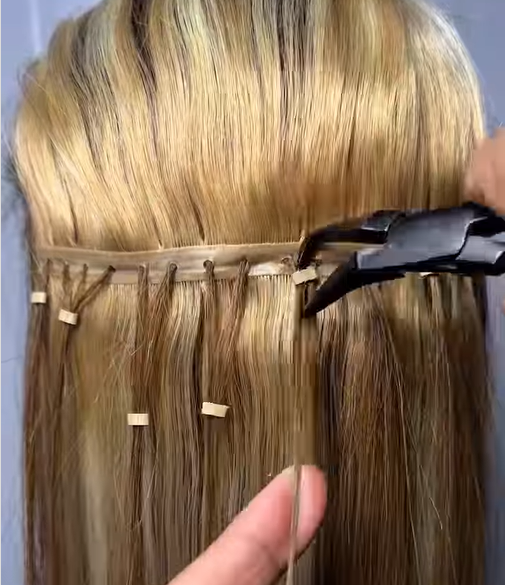
2. Add Microbeads
- Combine the pulled strand with a matching strand below the weft
- Slide on a microbead
- Clamp securely with pliers
- Repeat along the entire row
Pro Tip:
Silicone-lined beads provide extra grip and scalp protection — ideal for fine or sensitive hair.
3. Secure the End Points First
Before completing the whole row:
- Attach one-strand beads at the first and last holes
- This prevents the weft from shifting inward
- Then complete the row using the full two-strand bead method
Why it matters:
This method keeps the weft flat and prevents warping — improving comfort, longevity, and overall appearance.
STEP 5: Blend & Style
Once secured:
- Release the top section of hair
- Comb through to blend
- Add soft layers or texturizing if needed
- Style using heat tools as desired
Butterfly Wefts blend naturally with minimal effort.
4. Aftercare Instructions for Clients
Educate your client on proper maintenance:
Daily Care
- Brush from ends upward using an extension-safe brush
- Sleep with hair in a loose braid or low ponytail
Washing
- Wash 1–2 times weekly
- Use sulfate-free shampoo
- Condition mid-lengths to ends only
Styling
- Use heat protectant
- Avoid high heat directly on beads
Maintenance Schedule
- Move-up appointment every 6–8 weeks
- Wefts are reusable for multiple installations
5. How to Remove Butterfly Weft?
Removal is simple and damage-free when done correctly.
- Cut the thread carefully without touching your client’s natural hair.
- Open the beads using extension pliers.
- Slide the weft out gently.
- Clean the beads and brush out any shedded hair.
- Reinstall or store the weft for future use.
Butterfly wefts are reusable when properly maintained, making them a cost-effective option for salons and clients.
6. Common Mistakes to Avoid
❌ Cutting the weft before measuring
❌ Using too-small hair sections
❌ Beads placed too far from the scalp
❌ Pulling too much tension
❌ Not securing the end points first
❌ Installing on oily or damp hair
Avoiding these issues ensures comfort, longevity, and a professional finish.
7. Why Salons Love Order Butterfly Wefts from Wholesale Hair Vendors
Wholesale Hair vendors offer salons access to consistent quality, a wide range of lengths and shades, and bulk ordering options that reduce cost per weft. Reliable hair suppliers also provide technical support, ensuring stylists can achieve flawless installations every time. The durability of butterfly wefts allows them to be reused for multiple clients, making them a cost-effective choice for busy salons.
By sourcing from trusted wholesale hair vendors, salons can expand their service menu with a premium, easy-to-install extension type while maintaining client satisfaction and repeat business. Butterfly wefts combine professional-grade quality, efficiency, and versatility, making them a must-have for modern hair salons.

8. Choose Top Quality Butterfly Weft Extensions from Shiny Hair
As a global human hair supplier with 20+ years of experience:
100% Cuticle Aligned Human Hair
- True Double Drawn Quality
- 42+ Shades Available
- Custom Colors for Salons & Distributors
- OEM/ODM Service