Arabic
  English
  German
  Spanish
  Portuguese
  French
  Dutch
Dutch  Swedish
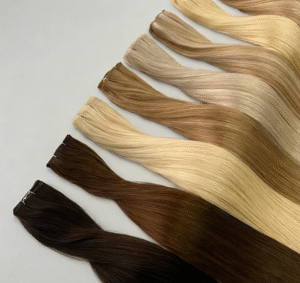
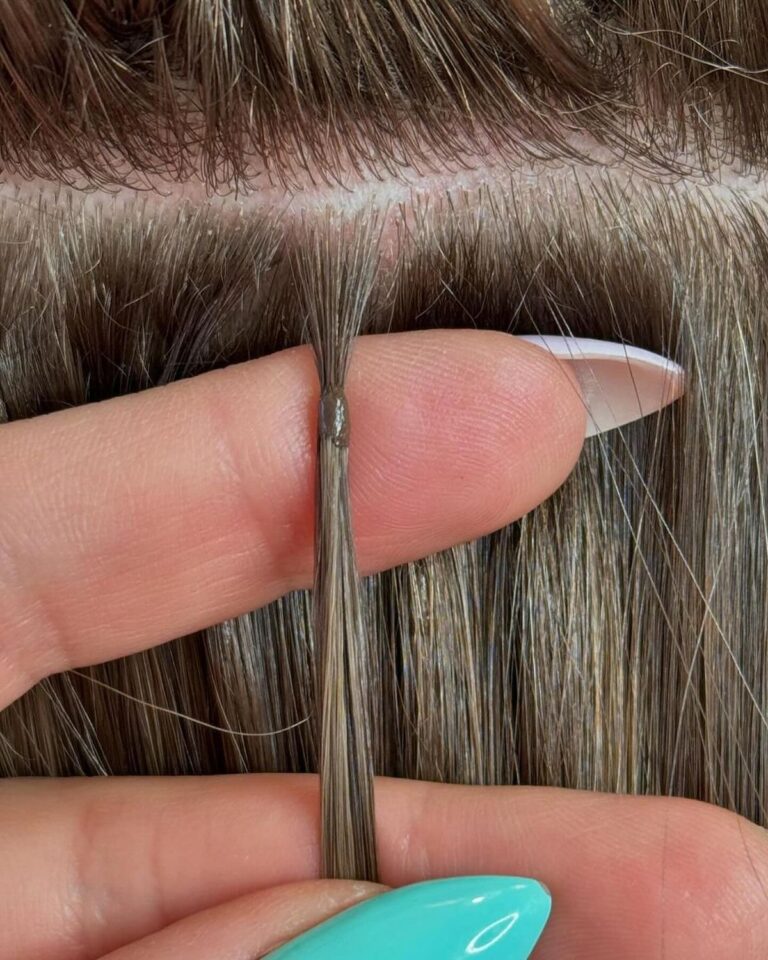
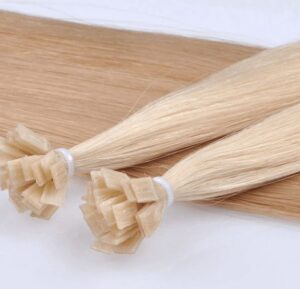
K Tips hair extensions are individual extensions with a pre-bonded keratin tip. During installation, the keratin is softened with a professional heating tool and formed around a small section of natural hair. Tip shape and bond design can vary by product, so always follow the instructions provided for the specific system.
K Tips extensions can be used to add length throughout the head or create more volume in selected areas. Because installation involves heat and close work around the scalp, professional installation is recommended.
Assess the Hair Before Installation
Start with a consultation rather than applying the first strand immediately. Check the client’s natural hair density, strength, recent chemical treatments, and any areas of breakage or excessive shedding. Pay particular attention to the hairline, temples, and other finer sections.
Consider:
- Natural hair density and thickness
- Breakage, shedding, or fragile areas
- Scalp sensitivity or visible irritation
- Recent bleaching or chemical processing
- The client’s usual parting and preferred hairstyles
If the scalp is irritated or the hair is too fragile to support extensions, the service should be postponed. Placement should also match the client’s usual hairstyle. Someone who often wears high ponytails or updos may need a different placement plan from someone who normally wears the hair down.
What Tools Do You Need?
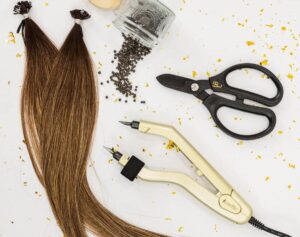
Prepare the tools and sort the extensions before sectioning the hair:
- Pre-bonded K Tip hair extensions
- Professional keratin fusion heating tool
- Tail comb and sectioning clips
- Heat-resistant finger protection or suitable handling tools
- Extension brush and cutting shears for finishing
- Any additional tools required by the product instructions
The extension weight should match the client’s natural hair density. Fine hair generally needs lighter placement, especially around the sides and hairline. Adding more strands is not always the right way to create more fullness.
<المادة ذات الصلة :كم تبلغ تكلفة وصلات الشعر؟>
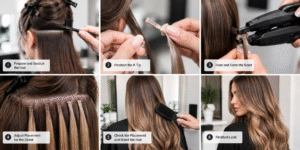
How to Install K Tips Hair Extensions
Step 1: Clean and Prepare the Hair
The natural hair should be clean and completely dry before installation. Remove heavy oils, leave-in products, and buildup from the root area.
Brush out tangles before creating the sections. Avoid applying heavy conditioner or oil close to the roots, as the hair needs to be clean and free from excess product around the attachment area.
Step 2: Create the Sections and Position the K Tip
Begin at the lower back of the head and work upward. Use a tail comb to create clean horizontal sections and clip the remaining hair out of the way. Each section should be large enough to support the extension but not so large that it creates an oversized or bulky bond.
Separate one clean section from the surrounding hair and make sure it is strong enough to support the selected extension. Avoid pulling neighboring hairs into the section, as this can increase tension and make brushing uncomfortable. Keep the bonds away from the scalp, hairline, temples, and other fine areas. Leave enough natural hair above each row to cover the attachments when the hair is released.
Place the K Tips beside the selected natural hair according to the tip design and the supplier’s recommended technique. The bond should sit near the root without pressing directly against the scalp. A small amount of space allows the hair to move and helps reduce pulling.
Step 3: Soften and Form the Bond
Use the professional heating tool according to the product instructions. Apply controlled heat until the keratin becomes workable. Avoid holding the tool in one place longer than recommended.
The heating tool should not touch the scalp, and softened keratin should not be handled with unprotected skin.
Once the keratin is workable, form the bond with a suitable professional tool or heat-resistant protection. The finished bond should be compact, even, and secure without trapping unnecessary hairs.
A clean, compact bond is easier to conceal and helps avoid unnecessary bulk.
Step 4: Adjust the Placement for the Client
Continue working upward while checking both sides of the head. Placement does not need to be identical everywhere. The back of the head may need more fullness, while the sides and finer areas may need fewer or lighter strands. Follow the client’s natural growth direction and intended hairstyle. For targeted volume, concentrate the extensions where fullness is needed. For added length, distribute them more evenly through the appropriate areas.
Step 5: Check the Placement and Blend the Hair
Release the natural hair and gently brush through the finished installation. Check the bonds from different angles, both with the hair down and with the hair parted.
ابحث عن:
- Visible or oversized bonds
- Uneven distribution
- Tangled areas
- Excessive tension
- Differences in density between the two sides
- A visible line between the natural and extension hair
Correct any placement problems before finishing. Trim and blend the lengths so the extensions transition naturally into the client’s hair when it moves, rather than only looking blended in one fixed style.
Common K Tips Installation Mistakes
Before finishing, check that you have not:
- Used an extension weight that is too heavy
- Taken sections that are too small or too large
- Placed the bond directly against the scalp
- Applied more heat than the product instructions allow
- Created oversized or uneven bonds
K Tip Hair Extension Aftercare
Clients should brush from the ends upward while supporting the hair near the roots. Avoid pulling directly on the bonds, and do not apply heavy oils or oily products to the attachments unless the stylist confirms they are suitable for the system.
Dry the hair carefully after washing, especially around the bonds. Heated styling tools should not be applied directly to the keratin bonds.
Loosely braiding or tying the hair before sleep can help reduce tangling. Clients should return for maintenance when the natural hair has grown out and the bonds no longer sit in their intended position.
Looking for K Tips Extension for Your Salon or Business?
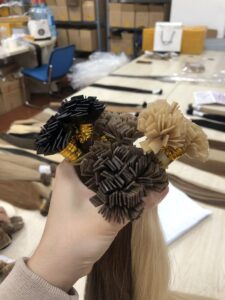
If you are sourcing K Tips hair extensions for a salon, wholesale business, or hair brand, Shiny Hair Factory can help you develop products suited to your market and installation needs.
Discuss your preferred hair quality, tip design, lengths, colors, packaging, and OEM or private label requirements with our team. للتواصل مع مصنع الشعر اللامع to discuss your K Tip hair extension project.
〈Related Articles:وصلات الشعر على شكل حرف K مقابل وصلات الشعر باللحمة〉
FAQ About K Tips Hair Extensions
Can K Tips extensions be installed at home?
Professional installation is recommended. The process involves heat and close work around the scalp, along with careful control of section size, bond placement, and extension weight.
Are K Tips extensions suitable for fine hair?
They may be suitable when the stylist selects an appropriate extension weight and uses smaller, well-planned placements. Fine areas around the hairline and temples should not be overloaded.
How are K Tips extensions removed?
K Tip extensions should be removed by a professional using the method recommended for the specific keratin bond. Clients should not pull, cut, or dissolve the bonds at home.
When do K Tips extensions need maintenance?
Maintenance depends on hair growth and the installation. The client should return when the bonds have moved away from their intended position or begin to affect comfort or styling.
Can I wash and style K Tips extensions normally?
They can be washed and styled, but the bonds need to be handled gently. Keep heavy oils away from the attachments unless the stylist confirms they are suitable, and use controlled heat without applying it directly to the keratin bonds.